Brute force video stabilisation with elastix
On my page about HP Spectre x360 battery charging problems I wanted to have an animation of a flashing battery LED. This needed to be a short looped video. Since I’d shot the video by hand, there was a lot of camera movement. Even finding the most stable one second of the video caused a glitch at the loop point.
Using FFmpeg’s deshake filter didn’t really reduce the glitch acceptably. Since I knew the final video had to be still, I didn’t need to find something that could distinguish deliberate movement from shake. I could look for something that could lock the image completely. This led me into the world of image registration.
This article is about my experiments with elastix. This is not supposed to be an example of how to use elastix perfectly, SuperElastix is probably a better place to start. This article is about how very simple image processing tools can be combined to bring in a tool that does a single job. It shows how you can break a complex problem down into small steps and refine each step until it works.
In the best tradition of hacking-around-at-the-command-line, the commands were all one-liners. I’ve reformatted them for display here by adding backslash-newline at various places. Some of the commands might not work without reassembling them into a single line.
The other tools I was using were FFmpeg, a tool that can process and convert videos, and Netpbm, a tool for processing and converting still images1.
elastix, FFmpeg and Netpbm are all available as standard packages on Ubuntu, so installing them was just a simple matter of using sudo apt install to install the ones I was missing.
Convert the video to images
The first step was to view my original video and find the part I wanted to start with. This gave me eight seconds starting eleven seconds into the video.
I could use FFmpeg to read information about the video by specifying my video as the input and not specifying an output:
> ffmpeg -i OriginalVideo.mp4
ffmpeg version 2.8.17-0ubuntu0.1 Copyright (c) 2000-2020 the FFmpeg developers
  built with gcc 5.4.0 (Ubuntu 5.4.0-6ubuntu1~16.04.12) 20160609
  configuration: --prefix=/usr […snip…] --enable-libopencv
  libavutil      54. 31.100 / 54. 31.100
  […snip…]
  libpostproc    53.  3.100 / 53.  3.100
Input #0, mov,mp4,m4a,3gp,3g2,mj2, from 'OriginalVideo.mp4':
  Metadata:
    major_brand     : mp42
    minor_version   : 0
    compatible_brands: isommp42
    creation_time   : 2018-11-22 21:23:57
  Duration: 00:00:19.61, start: 0.000000, bitrate: 17299 kb/s
    Stream #0:0(eng): Video: h264 (High) (avc1 / 0x31637661), yuv420p(tv, bt709), 1920x1080, 17022 kb/s, SAR 1:1 DAR 16:9, 30.01 fps, 30 tbr, 90k tbn, 180k tbc (default)
    Metadata:
      creation_time   : 2018-11-22 21:23:57
      handler_name    : VideoHandle
    Stream #0:1(eng): Audio: aac (LC) (mp4a / 0x6134706D), 48000 Hz, stereo, fltp, 256 kb/s (default)
    Metadata:
      creation_time   : 2018-11-22 21:23:57
      handler_name    : SoundHandle
At least one output file must be specified
This says that the original video is 1920 × 1080 pixels at 30 frames per second. This was more resolution and a higher frame rate than I needed. Reducing the frame rate and resolution at this step would make the processing faster. I decided 960 × 540 at 10 frames per second would be plenty.
The image was also bigger than I needed, but the final clip could wait until the end, as when the images get moved around, pixels outside the final clip rectangle would get moved inside. Since I didn’t know how much they would move, I didn’t clip the video at all at this point.
Having decided on the resolution, frame rate and time segment, I could use FFmpeg to extract those frames, scale them, and save them as individual PNG images. Extracting them into a directory made it easier to tidy up if I needed to start again:
mkdir Frames960x540
ffmpeg -ss 00:00:11 -t 00:00:08 -i OriginalVideo.mp4 -vf scale=960:-1 \
  -r 10 Frames960x540/frame%04d.png
For reference, with the FFmpeg scale option, if you specify −1 as one of the dimensions, then it will be calculated from the other, preserving the aspect ratio.
Checking the directory contents with ls Frames960x540 showed that 82 frames had been created. This was two more than the expected 80 frames for eight seconds at ten frames per second so I deleted the extra two frames with rm Frames960x540/frame008[12].png.
Incidentally, this explained some of the problems I’d been getting with glitching at loop points on other experiments. The light flashes once a second, so if the loop is not exactly a multiple of one second, there’s a glitch.
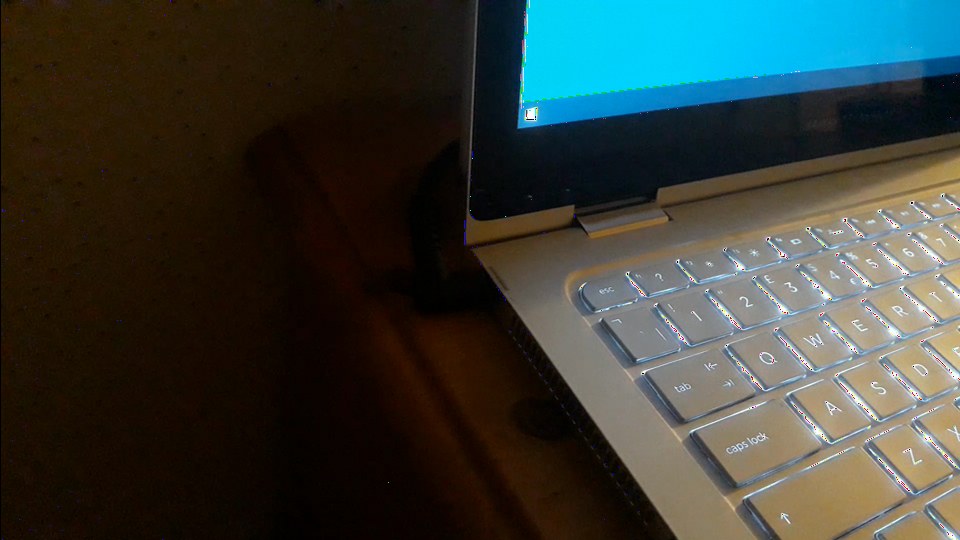
The images looked something like this (this is those images, recompressed into a video for the web at a fairly high compression, details later):
Aligning the frames with elastix
The next step was to align the frames. The obvious technique was to pick one of the frames as a reference and then align all the other frames to that. Since the first frame was stable, I just used that.
To run, elastix needs a parameter file. There look to be a million options. However, the problem I was trying to solve is fairly simple, not one of the medical image problems elastix was designed for. There are probably a range of parameters that work.
The manual (PDF) (via the elastix wiki) has an example parameter file in Appendix A. So I just used that, figuring I could always change it later if there was a problem.
I discovered elastix writes lots of files so I gave it an output directory for each frame. Like with the input, I put the elastix output in a separate directory to make tidying up easy.
Learning my way round elastix with a single frame
I started by processing just the second frame so I could learn how to use elastix and work out how to process the transformed images:
mkdir elastix960x540
mkdir elastix960x540/frame0002
elastix -f Frames960x540/frame0001.png -m Frames960x540/frame0002.png \
  -out elastix960x540/frame0002 -p param-example.txt
The first thing I learnt was that elastix produces a lot of output, so in future invocations, I threw away the standard output. The output looks to be copied into elastix.log.
elastix calculates a transform to align an image to reference. It outputs the parameters for the transform and the transformed image. You can use the transform to manipulate another image in the same way.
I started by looking at the transformed image that was output. I needed to convert it from raw format to something I could view:
rawtopgm -bpp 2 960 540 elastix960x540/frame0002/result.0.raw | \
    pnmtopng > elastix960x540/frame0002/result.0.png
That gave the following output (the inline image is a JPEG so has extra compression artefacts, click on it to get the PNG, although, on this image, the JPEG artefacts are not really noticeable):

This image had two problems:
- The image was greyscale when I wanted colour.
- There were pixels that look wrong: some very dark pixels had gone white and some very bright pixels had gone black.
Getting colour images out of elastix
I tackled the greyscale problem first with a simple strategy:
- Split the original image into red, green and blue channels using Netpbm’s ppmtorgb3 command.
- Use transformix to apply the transform to each channel separately.
- Use rgb3toppm to then merge the channels back into a single image.
Since FFmpeg and transformix work on PNG files, I used Netpbm’s pngtopnm and pnmtopng commands to convert back and forth between PNG and the simple format Netpbm’s processing commands use.
So, step 1: separate the channels, starting with PNG, ending with PNG:
for f in Frames960x540/frame*.png ; do pngtopnm $f > $f:r.ppm && \
  ppmtorgb3 $f:r.ppm ; echo $f; done
for f in Frames960x540/*.{red,grn,blu} ; do pnmtopng $f > $f.png ; done
rm Frames960x540/*.{red,grn,blu,ppm}
Step 2: run transformix on each channel:
for f in red grn blu ; do mkdir elastix960x540/frame0002/$f && \
  transformix -in Frames960x540/frame0002.$f.png \
  -out elastix960x540/frame0002/$f \
  -tp elastix960x540/frame0002/TransformParameters.0.txt ; done
Step 3: convert the raw output back to PGM format and merge to colour:
for f in red grn blu; do rawtopgm -bpp 2 960 540 \
  elastix960x540/frame0002/$f/result.raw > \
  elastix960x540/frame0002/$f.pgm ; done
rgb3toppm elastix960x540/frame0002/{red,grn,blu}.pgm | \
  pnmtopng > elastix960x540/frame0002.png
Doing that yielded the following image (the inline image is a JPEG so has extra compression artefacts, click on it to get the PNG: the top of the Windows task bar shows some and the noise around the keys changes colour):
Removing transformix processing artefacts
With the colour problem solved, I now needed to get rid of the bad pixels. Using the od command I could look at the contents of the raw file as 16-bit words and see what was in them. Eventually, I ended up with this command line which uses a standard shell trick to generate a histogram (sort piped through uniq -c):
od -Anone -t d2 -v -w2 elastix960x540/frame0002/red/result.raw | \
  sort -n | uniq -c | less
The top and bottom of the output were:
      1     -16
      3     -14
      8     -13
      9     -12
      6     -11
      6     -10
      2      -9
      6      -8
     15      -7
      6      -6
     13      -5
      7      -4
     16      -3
     15      -2
     48      -1
  36503       0
   2120       1
   3041       2
   3430       3
   3978       4
[…snip…]
    111     248
     87     249
     73     250
     85     251
     70     252
     67     253
     41     254
     23     255
     22     256
     19     257
     11     258
      7     259
      6     260
      4     261
      3     262
      1     263
      2     264
      3     266
      2     267
      1     269
So the transformation is generating pixels with values in the range −16 to 269 for this image. Best guess is that rawtopgm can't deal with this, so I needed to find an alternative way of converting the raw images to PGM. The raw files are a simple binary format, so I switched to Perl.
The first step was to read in the raw file with Perl and adjust the options to unpack until I got the same results as od:
perl -e '$/ = undef; while(<>) { @x =  unpack("v!*", $_); \
  print join("\n", @x); }' elastix960x540/frame0002/red/result.raw | \
  sort -n | uniq -c | less
With that done, all that remained was to clip the values, write them out as single bytes prefixed with a PGM header. The PGM format is designed to be simple enough for ad hoc tools to do this. Then, put that in a loop to process each of the red, green and blue channels and, as before, run it through rgb3toppm to reassemble them into a single colour image:
perl -e 'use List::Util qw(min max); $/ = undef; \
  foreach $f (<elastix960x540/frame0002/*/result.raw>) { \
  open(IN, "<", $f) or die; $of = $f; $of =~ s,/result.raw,.pgm,; \
  open(OUT, ">", $of) or die; while(<IN>) { \
  print OUT "P5\n960 540\n255\n", \
  pack("C*", map {min(max($_, 0), 255)} unpack("v!*", $_));}}'
rgb3toppm elastix960x540/frame0002/{red,grn,blu}.pgm | \
  pnmtopng > elastix960x540/frame0002.png
This got rid of the incorrect pixels without introducing any other obvious problems (again, inline JPEG, click for a PNG):

Processing all the frames
Having got the processing sorted, I could then process all the frames.
To make my life a bit easier, I created a shell variable holding a list of the basenames of all the frames I wanted to process. Frame 1 is the reference so I could skip that (although it probably would have been harmless to process it).
Since I use zsh, getting the list was fairly easy:
frames=(Frames960x540/*[0-9].png)
frames=($frames[2,-1]:t:r)
But it wouldn’t be too hard in other shells:
frames=($(cd Frames960x540 && ls *[0-9].png | tail -n +2 | \
  sed -e 's/\.png$//'))
I also removed the manually processed frame 2 to make sure it had the same processing as the other frames:
rm -rf elastix960x540/frame0002*
Now I could start the processing. In practice, each of these lines took me several goes to get right, but that was fine, that was the point of breaking this down into small steps.
So, run elastix on all the frames:
for frame in $frames; do mkdir elastix960x540/$frame && \
  elastix -f Frames960x540/frame0001.png -m Frames960x540/$frame.png \
  -out elastix960x540/$frame -p param-example.txt > /dev/null ; \
  echo $frame; done
Run transformix on each channel:
for frame in $frames ; do for f in red grn blu ; do echo -n "$f "; \
  mkdir -p elastix960x540/$frame/$f && \
  transformix -in Frames960x540/$frame.$f.png \
  -out elastix960x540/$frame/$f \
  -tp elastix960x540/$frame/TransformParameters.0.txt > /dev/null ; \
  done; echo $frame; done
Turn the raw image output into PGM files, clipping the values:
perl -e 'use List::Util qw(min max); $/ = undef; \
  foreach $f (<elastix960x540/frame*/*/result.raw>) { \
  open(IN, "<", $f) or die; $of = $f; $of =~ s,/result.raw,.pgm,; \
  open(OUT, ">", $of) or die; while(<IN>) { \
  print OUT "P5\n960 540\n255\n", \
  pack("C*", map {min(max($_, 0), 255)} unpack("v!*", $_));}}'
Merge the channels back into colour images:
for frame in $frames; do \
  rgb3toppm elastix960x540/$frame/{red,grn,blu}.pgm | \
  pnmtopng > elastix960x540/$frame.png ; done
Since I skipped frame 1, copy the original into the same location to make later processing easier:
cp Frames960x540/frame0001.png elastix960x540
Reassembling the images into a video
Now I could use FFmpeg to convert the individual images back into a video I can watch. This is the one place FFmpeg’s defaults let me down. I needed to override the pixel format so that Windows could play the video.
Note that since the input format is a series of images, FFmpeg can’t infer the frame rate so we have to tell it:
ffmpeg -framerate 10 -i elastix960x540/frame%04d.png -pix_fmt yuv420p \
  stabilised.mp4
Look at the edges of the video to see how the frames have been moved by the stabilisation (again, the video displayed here has been processed with different options):
Comparing the start and end of the video shows changes that haven’t been removed: have a look at the letter T on the keyboard.
The light should flash every one second so, in theory, a one second loop should be good enough to give a repeat. However, many times when playing with this, I’d had problems with timing glitches at the loop point, I felt a longer video would make the glitches less apparent.
Although I couldn’t get eight seconds, I could get three seconds and that was good enough.
By this point I’d created a directory to hold the good frames and I’d tried various options before deciding that the first three seconds were good enough. I populated the directory with the frames of interest:
mkdir trimmed
(cd trimmed && for f in ../elastix960x540/frame00{[012]?,30}.png; do \
  ln -s $f; done)
Now I could generate a video from these frames and add the crop to focus the area of interest onto the LED:
ffmpeg -framerate 10 -i trimmed/frame%04d.png -vf crop=384:216:288:178 \
  -pix_fmt yuv420p ElastixCropped.mp4
The resulting video was as follows. Note that this is the only video on this page not processed with the extra options that I’ll talk about immediately after.
Compressing for the web
Searching on the web to find the set of options that would generate the most portable video, tips on how to avoid loop timing glitches and techniques to reduce the size of the video (notably, this didn’t have to be a high quality video), eventually gave me this command line:
ffmpeg -framerate 10 -i trimmed/frame%04d.png -vf crop=384:216:288:178 \
  -level 3.0 -movflags +faststart -c:v libx264 -pix_fmt yuv420p -crf 29 \
  -preset veryslow ElastixCroppedForWeb.mp4
There is some degradation in quality compared to the previous video (look at the hinge and the ribbing on the power supply cable), but it’s in areas that were unimportant to the subject matter. More importantly, the video is now a third of the size (8.8 kB compared to the previous video’s 33.8 kB, most of the saving comes from reducing the quality with the -crf option, the rest from the -preset)2:
This isn’t perfect, there’s still a tiny bit of movement, but it was acceptable for my purposes and I was quite pleased considering the original footage was from a handheld mobile phone.
For comparison, this is what the frames from the original, unstabilised video look like when cropped to the same section.
So that’s it. It’s possible there are more integrated ways of doing this, but that’s not the point. I had a chance to play and learn.
References
The elastix documentation asks anyone using the software to cite the following articles:
S. Klein, M. Staring, K. Murphy, M.A. Viergever, J.P.W. Pluim, “elastix: a toolbox for intensity based medical image registration,” IEEE Transactions on Medical Imaging, vol. 29, no. 1, pp. 196–205, January 2010. download doi
D.P. Shamonin, E.E. Bron, B.P.F. Lelieveldt, M. Smits, S. Klein and M. Staring, “Fast Parallel Image Registration on CPU and GPU for Diagnostic Classification of Alzheimer’s Disease”, Frontiers in Neuroinformatics, vol. 7, no. 50, pp. 1–15, January 2014. download doi
1 I’m using Netpbm rather than a more modern tool like ImageMagick as I cut my teeth on Pbmplus, the precursor to Netpbm, and I’ve not yet played with ImageMagick. It’s on my list.
2 For reference, the larger videos on this page (which are 960 × 540 at 10 frames per second) are about 800 to 900 kB with the default options and about 120 to 135 kB with these options.
Comments should be addressed to webmaster@pertinentdetail.org.
Copyright © 2020 Steven Singer.